How to Burn Blogger RSS Feeds at Feedburner
What is RSS?
A RSS (Really Simple Syndication) feed is a XML-based format for your content. Most blogging platforms, for example, will have an RSS feed built in. Whenever you start publishing posts, your latest posts will be updated in the RSS feed. Visitors to your website can subscribe to your blog’s RSS feed in an RSS reader such as Google Reader.
What is FeedBurner?

However, if you want to make it more obvious and easier for readers to subscribe using RSS, or want to know exactly how many people subscribe to your blog then the best option is to add a Feedburner RSS feed and email subscription to your blog.
Feedburner is a free web service which enhances bloggers and podcasters ability to manage their RSS feeds and track usage of their subscribers.

How to create a feed with feedburner
1. Go to Feedburner and sign in to Feedburner with your Google Account (create a Google Account first if you don’t have one).
2. To set up your RSS feed with Feedburner, simply copy the URL of your RSS feed and paste it into the “Burn a feed right this instant” box. Then click Next >>

3. On the next screen, choose the second options - RSS.

4. On the next screen you will be given your RSS feed’s new URL on Feedburner. You will want to use this URL anywhere you reference your RSS feed on your blog. Change the feed title and address with your own.

5. When you click on Next, you will be given the options to setup tracking features for your RSS feed.
Check "Clickthroughs" and "I want more!..." options.

Adding Your Feedburner Feed To Your Blog
This is used to add the RSS icon and easy subscribe options to your blog side bar using a text widget as explained below:
1. Click on the Publicize Tab > Chicklet Chooser in your Feedburner account and copy the HTML code.
2. Go to Blogger Dashboard > Design > Page Elements and add a new gadget
3. Select HTML/JavaScript from the pop-up window and paste the html code in the box.
Adding a FeedBurner Email Subscription
After you have set up your feed, you will want to consider giving visitors the option to subscribe to your content via email. If so, you will want to go to the Publicize tab and click on Email Subscriptions. Click on the Activate button to start email subscription service for your RSS feed.

You will then want to click on Communication Preferences in the left sidebar menu. This will allow you to customize the activation email subscribers receive to confirm their subscription.

Once customized, click Save. The next options you will want to configure are under Email Branding in the left sidebar menu. This is where you can upload a logo, customize the Email Subject line, and change the font styles, colors, and sizes to format the email subscribers will receive. Click Save when finished.
The last (and most important) setting for your email subscription is the Delivery Options. This is where you will tell Feedburner what time to deliver new RSS feed updates to subscribers.
Once saved, click on the Subscription Management link. Here, you can get the code to add a subscription form on your blog or you can get a link to your take visitors to the opt-in form for subscribing via email.

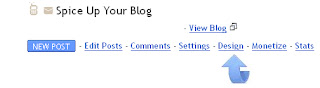
1. Go to Blogger Dashboard > Design > Page Elements
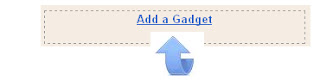
2. Add a new Gadget
3. Select HTML/JavaScript & paste the code in the box.
Redirecting All Your Blog Feed To Feedburner
Unless you redirect all your blog feed to Feedburner you won’t get accurate subscriber numbers because some of your readers subscribe using your original blog feed.
To do this:
1. Go to Settings > Site Feed in your blog dashboard
2. Add your Feedburner address to Post Feed Redirect URL and click Save Changes.

3. Now all your feeds is automatically redirected through FeedBurner and you’ll be able to track subscribers.
If you are enjoying reading this blog, please consider Subscribing!
Libellés : feedburner, how to, RSS
publié par Anonyme @ 17:22
0 commentaires

 So many blogs and websites i visit these days have implemented a pop up subscription form for their newsletter.I'm sure you have seen it, you land on a site and after a few seconds a form appears asking for your Email to subscribe.While these can annoy some people they have been proven to have a dramatic effect on the numbers of subscribers.In this post i will show you how to add a similar form to your Blogger blog but with a form to subscribe to your blog via Email Rss provided by feedburner.The form is a one time pop up so if someone visits your blog every day it will remember they visited before and not show the form again.
 Email subscriptions are an option every blogger simply must provide and there is one service that dominates Email Rss.The Google owned feedburner does it better that anyone else.In this post we are looking at how you can get the most from the Email Feed offered on your blog.If you have not got a Feedburner Feed or Email Feed check out
  In the last post we got a sneak preview of the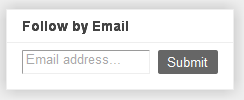


 Hi Guys ! When going through an old Photobucket account i came across a few Rss feed banners i have used below posts on different Blogs.Were you place your Feed options on your blog can have a huge effect the number of readers that take up the option to Subscribe.It's also important that the way your feed options are presented grab the attention of readers.So many websites and Blogs use the standard Rss Icon it has become White Noise.So in this post we will cover both placing a Feed option in Prime position and using a Rss Banner that will grab the attention of the reader.




 Your Blogs Rss Feed by default displays the latest 25 posts.This is true with the default Blogger feed and the Feedburner feed.Most blogs are using the Feedburner feed provided by Google and if you don't you should (
 In yesterdays post we looked at the options and settings for the Feedburner Email subscription service.As i said in that post providing your readers with the option to subscribe by Email is not an added extra it is an absolute must.Feed burner help make it easier by providing code for a link or a submission form you can add to your blog.

 Remember you can get all these tips sent directly to your email and stay a step ahead.Its a quick and easy service


