mercredi 2 mai 2012

How To Delete A Blogger Blog Using The New Dashboard Design - Video Tutorial

Blogger Logo Black Background
In the last post we had a video screen cast showing how to Back Up And Restore A Blogger Template in the new Blogger design.In this post we continue with the new Blogger design tips theme and show how to delete an unwanted blog.Remember when you delete a blog on Blogger you have the option to restore it within 90 days.Check out the video below and look out for more screen casts on using the new Blogger in upcoming posts.


How To Delete A Blog On The New Blogger Design

Click Here To View Full Post >>

Libellés : , ,

mercredi 19 janvier 2011

How To Automatically Redirect A Blogger Blog To Another URL

Blogger Redirect Code
There are a number of reasons you may want to automatically send visitors to your blog to another URL or from one blog to another.For example if you moved your blog, if you had two blogs and wanted to focus one just one and cover both topics.Automatically directing visitors to another URL is actually quiet easy and only requires a snippet of code added to the top of the template.In this post i will show you the code needed to automatically Redirect from a Blogger Blog to any other URL.

Firstly i should mention some people don't like to be redirected and you should only direct to a site with similar content.If you redirect people to sales pages, sites with adult content or anywhere the user is uncomfortable with it will put your Blogger account in jeopardy.For this reason the code i have in this post can be set to Redirect in an amount of time set by you.So you can set the code to redirect after 5 seconds and place a message at the top of the blog telling visitors they will be redirected.
Click Here To View Full Post >>

Libellés : , ,

vendredi 14 janvier 2011

Use The Old Layout Blogger Templates Including Minima And Rounders

old layout blogger templatesI was recently contacted by a disgruntled Blogger telling me they had been using the Minima Stretch template, decided to try a custom template and wanted to switch back.Since Blogger launched the template designer with brand a brand new selection of Templates he went into a panic as he didn't know how he could still select Minima or any of the old Blogger templates.You will be glad to know you can easily access all the Blogger standard blogger templates from before the introduction of the Template Designer.

The old Blogger Templates were launched in 2006 and included 16 Templates in a number of styles, colors and sizes.The templates included Minima, Denim, Rounders, Minima Stretch, Herbert, Harbor, Scribe, Dots, Thisaway, Snapshot and Tic Tac.


How To Select The Old Layout Blogger Templates


1. In Your Blogger Dashboard Click > Design > Edit Html > Scroll To The Bottom Of The Page.

2. You will see the Old Templates And Classic Templates Option, Click On 'Select Layout Templates'.


3. You can now pick from the old layout Blogger Templates, Make sure to not click the Classic Templates option this reverts back to old Blogger Template Code.

Simple, you can check out the Best Blogger Custom Templates on our Templates Site.

Drop Any Comments, Views And Questions Below.

Libellés : , , ,

jeudi 16 décembre 2010

New - Search And Add YouTube Videos From Your Blogger Post Editor

If your a Blogger that likes to add Videos to their posts on Blogger a brand new option has been added to the Blogger In Draft post editor to make the process much easier.Blogger have just added a new feature that will allow you to search YouTube for videos and add them to a post without leaving the post editor.Like most new features the button has been added to Blogger In Draft at first and it usually takes a week or two before it is added to the main Blogger site.

How It Works


First you must be logged into your Blogger Account via Blogger In Draft

When you click the Video icon in your post editor you will now see two new options "From YouTube" and "My YouTube Videos".From YouTube with generate a search bar for you to find a video you want to use and My You Tube Videos will show a list of videos you have uploaded to YouTube.


From YouTube Search Results :


Once you see the video you want to use click select and you can drag and drop the video into position in the same way you would with an image.

Drag And Drop :


I Think it's another great new Blogger Feature and once again shows Blogger is getting better all the time, You can get more info in the official Blogger In Draft.Post.Check out more of the latest Blogger News.

Drop Your Comments, Views And Questions Below.

Libellés : , ,

vendredi 26 novembre 2010

Fix The 'Cannot Find A Feed' Problem On Blogger

This is a quick post that I'm sure any of you that have experienced problems with Finding a feed from their blogs URL will appreciate.In fact even if you have not come across this problem you might want to follow the steps to make sure your Blogs feed can be easily found.OK so the problem I'm referring to occurs when you enter your Blogs URL (Home Page Address) somewhere and they try to fetch your Feed but return unsuccessful.Examples would be when you submit to Blog Directories, Add your blog to a Blog Roll or comment on Blogs with Comment Luv.In all these cases they try to find the feed to list one or more of your recent posts but the feed cannot be found.

This is a problem a number of Blogger users seem to be having and it can be easily fixed.Below i will show you a snippet of code you can add to the head of your template that can be found instantly.Sounds good so lets do it.

Add Default Feed Link To Your Blogs Template


Step 1. In Your (New Design) Blogger Dashboard Click The Drop Down Menu For Your Blog > Choose Template > Then Edit Html > Now Proceed as shown in the video Below :

Step 2. Find the following piece of code in your blogs Html (It's Near The Top):


Step 3. Copy and paste the following code Directly Below / Under


Note - You must make the following changes :

Replace YOUR-BLOGS-FEED-URL with your blogs feed address, If you have a Feedburner URL use that otherwise use the default feed(Drop a comment below if your unsure of your blogs feed URL).

Replace YOUR BLOGS TITLE with the title of your blog, for example i would add Spice Up Your Blog.

Step 4. OK Save Your Template, you have added a feed link to your template that can be quickly found and returned by any Programme, Bot, Spider or Aliens from Jupiter.Make sure to check out more of our Posts with Tips To Help With Your Rss Feed.

Drop Your Comments, views and Questions Below.

Libellés : , ,

samedi 13 novembre 2010

Use A Scrolling Blog Title And Message In Browser Tabs On Blogger

Blogger LED IconThis is a unique Blogger trick you might want to try on your blog.When someone is on your log the name of your blog appears in both the tab section and top of the users browser.In this post i will show you how you can make the title scroll and even add an extra message to scroll across the browser.To do this we add a small piece of code to your template with your blogs title and message.

Live Demo - See The Demo Here

Add Scrolling Effect On Your Blog

Step 1. In your blogger dashboard click > 'Design' > 'Edit Html'


Step 2. Find the following piece of code in your blogs Html :
(It's At The Very Top)


Step 3. Copy And Paste The Following Code Directly Before / Above


Edits

Replace Name Of Blog Here - Message Here with your blogs title and your message.

You can also change the dots in blue with a different symbol, maybe try hearts or music symbols - List Of Symbols.

Once you have made the changes save your template and check it out.Be sure to check out more of our great Blogger Tips and Design Tips.

Leave your comments, Views And Questions below.

Libellés : , ,

mercredi 10 novembre 2010

What Are Bloggr BX Errors And How To Report Them

Ah the Blogger BX Error is there anything more frustrating ? You get a fancy new gadget for your blog, drag it into place, click save and in the blink of an eye your on a page telling you there has been a BX error.The Blogger help forum gets lots of treads started daily from very annoyed Bloggers asking how to fix a BX error.So what exactly is a BX error ?

In short a BX error is a problem on Bloggers side so it's not something you have done wrong.Most errors that occur within your Blogger account have a pre determined fix built in, this kicks in and the error is fixed without you even knowing anything happened.But some more obscure errors don't have a smooth fix and the request be it saving a gadget, publishing a post etc.. can not be completed.This is when you encounter the BX error.The reason for 'BX' is to help Blogger categorize the error, a way to track a specific Bug.Usually an error will occur on just one or two blogs but sometimes there is an error that effects a large number of blogs.This will one again be down to Blogger or a bug in a service blogger use.Of course if you are experiencing a BX error knowing why it is happening is not much good is it !


How To Fix BX Errors (Or Try To Fix Them)

So how do you fix a BX error, the short answer is you don't.I have seen other blog posts telling people to clear the cache on their computer, use a different browser etc..and while you can try this it simply wont work.Frustrating as it is you have to be patient and the two real options available to your are as follows :

1. Report the error directly to Blogger - Blogger have a document available for you to submit the error you can find it here.

Report Blogger BX Errors


2. Look For Help In The Forum - The Blogger help forum is a great community of fellow bloggers lending a helping hand.You can look for others with the same problem or start a new tread looking for help.If the problem is common there is a better chance of Blogger looking into it and hopefully fixing it quicker.

Blogger Help Forum

I'm afraid there is errors in every system and there is no quick fix but do keep trying to complete your request as it often sorts it self out in a short space of time.Make sure to Check out more of our Blogger Help Posts.

Whats your experience of Blogger BX errors ?

Leave Your Comments, Views and Questions Below.

Libellés : ,

lundi 8 novembre 2010

How To Remove The Blogger Share Buttons Widget

Blogger added a set of share buttons to blogs back in June 2010 that can be placed at the top or bottom of all your blog posts.The compact share buttons widget has 5 icons for readers to Email your posts and share on Blogger, Facebook, Twitter and Google Buzz.Opinion is divided on this 'social bookmarking' widget, personally i feel they could have joined up with one of the big bookmark sites like AddThis and created something unique to Blogger Blogs.Maybe made various options and styles along with counter buttons for Twitter and Facebook and added more sites like Digg and Stumble Upon.To date we have over 30 Bookmarking widgets on Spice Up Your Blog so you can check them out if your also unhappy with the default buttons.

This post in in reply to a comment from David Turner on the post "Remove The Blogger Quick Edit Pencil And Spanner Icons".David asked :

"How can i remove the share icons (facebook,twitter etc.) from my blog. i have tried to remove them by clicking on edit option on blog posts and then not checking the show share buttons option. but it does not work . is there any other way"

There is another way to remove the buttons and below i will show you how it's done, first i will show you the default method which David has already tried.

How To Remove The Blogger Share Buttons

Option 1. The easiest way is to click the edit option on the Blog Posts section of your Design page and then Un-Check the share buttons as David said.So in your Blogger Dashboard click the 'Design Link' > On the Design page click the small 'Edit Link' in the bottom right corner of the blog posts section.This will generate a pop up window from which you can find and Un-Check the Share Buttons as shown below.


Option 2. For some on you Like Dave using a custom or older template this may not work and you will have to remove the code for the share buttons from your template Html.So for Dave and anyone else having trouble removing the buttons here are the steps.

Step 1. In your blogger Dashboard click 'Design' > 'Edit Html' > Tick the 'Expand Widget Templates' box.


Step 2. Find the following piece of code in your blogs Html : (Click Ctrl and F for a search bar to help find the code - More Info)


Step 3. Now simply Remove the piece of code you just found and save your template.That's it the Blogger Share Buttons have been removed.

I hope this helps Dave and other having trouble trying to remove the Blogger share buttons from their blogs.If you have a question or need help with any aspect of your blog why not drop a comment or contact me via the Contact link in the menu bar.If your question is on a subject i haven't covered i could write a full post to answer you, and add a link to your blog in the post !

Check out our other Blogger Help Posts and Social Bookmarking Gadgets for some awesome Info.

Drop your Comments, Views and Questions Below.

Libellés : ,

vendredi 5 novembre 2010

Make Blogger Read More Link Jump To Top Of Posts

The Read More Jump Break option was added to Blogger over the last year and it was a great addition.By using the Read More Jump Break you can display a short summery of your posts on the home page with a link or button for readers to continue to the full post (More Info On Read More).On this blog i use a special summary and thumbnail on the homepage that automatically cuts the posts into summary boxes.However on other blogs i use the Blogger Read More feature and i have just one problem with it.

When you click Read More on the home page it jumps to the point at which the post was cut.So basically if you add the jump break after the first paragraph when someone clicks Read More they will land on the post after the first paragraph.On one Blog in particular i wanted the Read More link to lead to the top of the post and not skip any content.If you would like to make the same change it's quick and easy and in this post i will show you how.

Make Read More Jump To Top Of Posts

Step 1. In your dashboard click > 'Design' > 'Edit Html' > Tick The 'Expand Widget Templates' box.


Step 2. Find the following piece of code in your blogs Html : (Click Ctrl and F for a search bar to help find the code - More Info)

Note - If you cant find that code (make sure you ticked 'Expand widget templates') simply look for 'jump' and move to the next sep.

Step3. Below the code you just found you will see a section of code like below :


Step 4. Simple remove the section i highlighted in red so it looks like this :


Step 5. Once your happy you got the section removed save your template.

That it your Read More links will now lead to the top of the post,  check out more of our Blogger tips.

Leave you Comments, Views And Questons Below.

Libellés : , , ,

dimanche 31 octobre 2010

Display Blogger Labels In A Drop Down Menu Gadget

blogger labels trickIn this post we have an excellent tutorial showing you how to display your blogger labels, tags, category's or what ever you like to call them in a drop down menu.There are a number of reasons this Blogger trick is useful.First of all by displaying your labels as a drop down menu you can have them placed in prime position at the top of your blog without taking up too much room.Some blogs i have seen have up to 50 different labels and even more, these labels in a list or cloud would take up a huge amount of space in the sidebar.Secondly we will add the hack to only one labels gadget, so you can have a drop down list of your blogs labels and still have the option to add a list or cloud version elsewhere on your blog.To make this as easy as possible for everyone we will add a new labels gadget and then add the code needed to make it a drop down menu.

Live Demo - Scroll to the end of this blog to see the drop down labels gadget in the footer section.

OK lets add a Drop down labels gadget to your blog , you might want to back up your template before you start.

Drop Down Labels Menu Gadget For Blogger

Step 1. In Your Blogger Dashboard Click > 'Design' > 'Add A Gadget'


Step 2. From the pop up menu scroll to find 'Labels' and click the 'Add' icon.
Important - The gadget will have the title 'Labels' change this to zzzzz and save the gadget.


Step 3. Now advance to your 'Edit Html' page - Do not tick the 'Expand Widget Templates' box.


Step 4. Find the following in your blogs Html : zzzzz
(Click Ctrl and F for a search bar to help find the code - More Info)

Step 5. When you locate zzzzz it will be in a section of code like this :


Step 6. Replace that full line of code with the following code :


Note - The text in red is what will be seen on drop down menu and can be changed to Tags, Category's etc..

Step 7. Save Your Template - The labels gadget is now in drop down form.You will want to change the name of the gadget from zzzzz, to do this just return to your Design page > Edit Gadget and change to Labels or Category's etc..

That it you have a very useful drop down list of your blogger labels for readers to easily navigate.Remember only this labels gadget will be in drop down format and if you remove it you will have to start from step 1 again.We have lots more Similar Blogger Tips and Hacks for you to check out and don't forget to leave your comments below.

Libellés : , , ,

lundi 25 octobre 2010

Add A Unique Reply Button To Blogger Comments

reply button blogger comments
Back in March this year in what has become one of the most popular posts on Spice Up Your Blog i showed you How to add a reply option to the Blogger Comments.Once added the a reply link was added to all the comments and you and your readers can reply directly to a comment.Obviously lots of you have added the reply option to your blogs comments so i thought i would add some extra features to it.In the original tutorial we added the Text '[Reply to comment]' so lets spice it up a little and replace that text with a button or image.Also i have added a title to the reply option and set it to float on the outside of the comment body, a better option with better design.

If you haven't added the old reply option we will show you how all the steps required, If you have already added the text reply option to your blogger comments i will show you how to change the text to an image or button.

Update Jan 2012 - Blogger have added this as default find out more here - Threaded Comment Replies Added To All Blogger Comment Forms.

Live Demo : You can see a working demo of the comments with reply button Click Here.

How To Add Reply Button To Blogger Comments

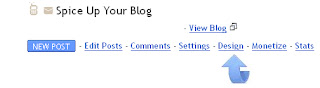
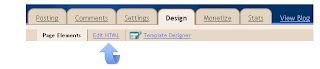
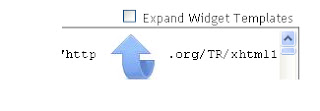
Step 1. In your Blogger Dashboard Click 'Design' > 'Edit Html' > Tick the 'Expand Widget Templates' box.


Step 2. Find the following code in your blogs Html :
(Click Ctrl and F for a search bar to help find the code - More Info)


Step 3. Choose the Reply button you want for your blog and add the corresponding code Directly Below / Under

Button 1.


Button 1 Code.

Best Blogger Tips

Button 2.


Button 2 Code.

Best Blogger Tips

Button 3.


Button 3 Code.

Best Blogger Tips

Button 4.


Button 4 Code.

Best Blogger Tips

Button 5.


Button 5 Code.

Best Blogger Tips

Button 6.


Button 6 Code.

Best Blogger Tips

Button 7.


Button 7 Code.

Best Blogger Tips

Button 8.


Button 8 Code.

Best Blogger Tips

Button 9.


Button 9 Code.

Best Blogger Tips

Button 10.


Button 10 Code.

Best Blogger Tips

Important

You must now add your blogs ID to the code, replace YOUR-BLOG-ID-HERE in red with your blogs ID.You can get your Blogs ID by going to your blogs Design Page, Posting Page, Settings Page or any page accessed from your dashboard.

Your Blogs ID will be in the address bar like this :


Once you have added your Blogs ID save your template and the reply button has been added to your Blogger comments.

OK the next tutorial is Only For People that have already added the text reply from our previous post.For everybody else the button should now be on your blog so check it out..

Replace The Text Reply With An Image

If you added the text reply you can change it to a Button.
To do this follow the steps as above then find this code in your template :

[Reply to comment]

Now Replace that code with one of the fllowing (See The Button Demos Above) :

Button 1
Button 2
Button 3
Button 4
Button 5
Button 6
Button 7
Button 8
Button 9
Button 10

OK that's your new Improved Reply Option added to your comments ! We have lots more tips on Making Blogger Comments Better.Let us know what you think...

Libellés : , , ,