mercredi 30 septembre 2009

How To Have A Private Or Invitation Only Blog On Blogger

When you set up your blog on Blogger the default setting is to display your blog to the world and be displayed in search engine results and most people are looking to build a following so they leave the settings as they are.But a blog can be a great tool for community's, groups and family to stay connected online and these are blogs you may not want shared with the entire Internet.Not a problem a few quick changes in the settings can block search engines from crawling your Blog and stop anyone you have not personally invited by Email from seeing your blog.

Making Your Blog Private

Step 1. When in your blogger dashboard click the "settings" option for the blog you wish to make private.

Step 2. Now Click Permissions.

You have two options here :

1. You can choose who you want allow to view your blog by clicking "only people i choose"
Then just add the email addresses of who you permit, no one else will be able to view the blog.

2.You also have the option to allow others to write posts in your blog, just add the emails as above and they can log in and write to your blog.

Once you invite an author and they accept you can also grant them 'Admin Privelages' by following the 'Settings' > 'Permissions' route - The invite must be accepted before you grant Admin Privileges.

Now that author can also invite people to your blog, this is a great way to make your blog a community.

Block Search Engines And Blog Lists

In your basic settings you have the option to stop search engines crawling your blog and stop Blogger from adding your blog to their listings - just click settings and scroll to :

'Add your blog to our listings ? ' Select No
'Let search engines find your blog ?' Select No

Make sure to scroll to the foot of the page and save your settings.

Your blog is now completely private, if you have any questions help is only a comment away.

Libellés : ,

mardi 29 septembre 2009

Spice Up Your Blog Complete Table Of Content

Below find the complete list of posts on Spice Up Your Blog.


dimanche 27 septembre 2009

Contact Me

If you need more help with one of the posts / tutorials, for example code is not working or having trouble adding code to your blog please use the comment form below the post in question.

If your question is in relation to an issue not related to a post on Spice Up Your Blog or if you have a problem with Blogger in general i suggest posting it in the Blogger Help Forum - Blogger Help Forum Here.

Otherwise you are more than welcome to contact me via this contact form!

Fill out the form below and i will get back to you as soon as possible.

Please include your Blog address and any other relevant information..

foxyform.com


Click Here To See How To Make A Contact Me Page For Your Blog

How to add a small search box to your blog

How to add a small search box to your blogIts easy to add a search box for your readers to search your blog.
On blogger we have the option to add a google search to our blog.
I think the google search box is too big and un-editable so i added my own small search box.

This search is just as effective and very easy to add to your blog and you can make it appear to suit your blogs style and colors.

This is the search box:


Search Spice your blog


To place this on your blog you just gotta copy the code below and replace by URL with yours and you have the option to make some changes to its appearance.

Below is the exact code that makes up my search box:


Search Spice your blog


Only one part of this code must be edited before adding it to your blog that is the URL :

1.The URL : http://spiceyourblog.info/search - change this to your blogs address : http://www.yourblogaddress.com/search

Your search box is now ready and will search Your blog OR you have the option to make three more changes to personalise your search box .


We Are Nearly Finished
If you need more help or have an opinion or suggestion,
Please leave a comment Below.

2.The text : Search Spice Your Blog- is the text that appears above your search box you can change it to anything you like or leave blank to have no text.

3.The text : Type and search... - is the text that appears inside the search box and can be changed or left blank for no text inside the box.

4.The URL : http://i631.photobucket.com/albums/uu40/paulcrowe/searchbuttonsbx.jpg - is the URL of the image that appears below the search box.This can be changed (check Photobucket.com for some small search icons) or it can be removed to have no image.

So theres your small search box enjoy.

Libellés : , ,

How Back Up Your Blogger Template With Hard Drive Or Notepad

How to save template with notepad or hard driveWithin this blog we talk a lot about making changes to your template by editing the html that makes it up.Something i quickly realised is that changes don't always work first time so its vital to be able to revert back to the template before you made changes.

I do this in one of two ways :


1.Save to hard drive.


Simply click the "Download full template" option above the html area.
You will get a small window pop up,click "save" then save it (just save it to documents).

Then if your not happy with the changes you made instead of having to rummage through all the code again to discard the changes just click the browse button above your template html select the template as you just saved it upload and your back as you were.

Back up blog template

2.Save to Notepad

Every computer has a notepad build in here's how to access it :

1.Click start menu (Bottom left of your screen)
2.From your start menu click all programmes
3.You get another menu just click accessories
4. In the accessories menu choose notepad.

Copy the code all from your template and paste it into notepad.Then If the changes you make to your template don't suit simply swap the code you saved to notepad back into the html area and save.

Important - Make Sure To Tick The 'Expand Widget Templates Box' Before You Copy The Code And Tick It Again Before Putting Code Back

If you have any questions drop a comment below !

Libellés : ,

vendredi 25 septembre 2009

How to make a clickable picture link

How to make a picture (an image, photo or screenshot) clickable, that is, become a hyperlink.

The first thing is you must get the picture up on the web. This you can do by uploading to Photobucket.

You can choose one of the billions pictures they have or if you have an account or open an account (its free) you can upload an image.


Once you upload or select an image you will get code for the image in four formats you must select HTML.

So for this we will use this image.

Photobucket

When you click this image it will lead you to Photobucket.com.
So we gotta change the direction.

This is the Html for this picture its the same as the code you use sending any pictre comments in Myspace etc...

We are interested in the address http:// photobucket.com.

http://photobucket.com" target="_blank">Photo Sharing and Video Hosting at Photobucket


The address determines were the picture leads to when clicked.
So we simply change it to were we want the picture to lead to.

In This case we will change it to http:// spiceyourblog.info :


http://spiceyourblog.info" target="_blank">Photo Sharing and Video Hosting at Photobucket


By changing the address the picture now leads to this site.
Easy.

But were not finished yet take your cursor and put it over the picture

You will see a line of text appear "Photo Sharing and Video Hosting at Photobucket" (does not work in all browsers)
We can also change this it gives a discription of the image and also helps get your image indexed in Google image searches.
We Are Nearly Finished - First A Quick Remunder:
If you need more help or have an opinion or suggestion,
Please leave a comment Belo

The code we are interested in here is "Photo Sharing and Video Hosting at Photobucket".

</span><strong><span id=Photo Sharing and Video Hosting at Photobucket" />


We simply change this text to whatever we want it to say like this :

</span><strong><span id=Type the text you want here" />


Now the text will show "Type the text you want here"

Try it out :

Type the text you want here

You now have a simple professional hyperlink that leads to anywhere you choose.

Libellés :

How To Make An Easy Clickable Link

In this post i will show you how to make a text link or hyperlink.

Making the link is very simple.

This is how you would create a link directing to this site:

http://www.spiceupyourblog.com"> Click Here


And this is how it looks:

Click Here

To make the link direct to your site or any web page you want all you have to do is replace my link (the bit in red) with your link.

Replace this with your link">Here

You may also change the text that shows.

So instead of "Click Here" you could have :

http://www.spiceupyourblog.com">abcdefghij

Which appears as so:

abcdefghij

This is just a simple html text link for more help and a more indept look at creating links check out w3Schools.

More help is only a comment away.

Libellés :

How To Make A Youtube Video Auto Start Or Auto Play

auto play youtube videoThis is very easy to do and also a very common question.When you place a YouTube video on your blog the default setting is set for the video not to start unless play is clicked.If you would like the video to start automatically when someone arrives on your page you just need to add a simple piece of code.

Make A YouTube Video Auotplay

 YouTube have a newer embedd code and an old code i will cover both.You can see in both codes were i have added &autoplay=1

- The old YouTube code

&autoplay=1">&autoplay=1" type="application/x-shockwave-flash" width="425" height="350">

- The New YouTube Code


With the auto play code added your video will now start automatically.

Drop Your Comments, Views And Questions Below.

Libellés : ,

How To Totally Remove The Blogger Navbar Or Top menubar

The blogger navbar is standard on all blogger templates.Some don't mind it personally i don't like it.Removing it is easier than you might think.In fact i have this Blogger tip down to three easy steps for you.

Remove The Blogger Navbar


Update 25-07-2012 - Blogger have now added a simple option for this : How To Turn Off The Blogger NavBar.

Step 1. In your Blogger dashboard click Design > Edit Html.

Design Edit Html Blogger

2.Copy the code below :

#navbar-iframe { display: none !important;}


3.Place it in your blogs html below the template details (found very close to the top of you html) and just above /* Variable definitions as displayed below:


-----------------------------------------------
Blogger Template Style
Name: Minima Stretch
Designer: Douglas Bowman / Darren Delaye
URL: www.stopdesign.com
Date: 26 Feb 2004
----------------------------------------------- */

#navbar-iframe { display: none !important;} <---- Just Below Template Details


/* Variable definitions
====================


If you don't want to completely remove the navbar you can make it into a 'Hover Effect' so it will only appear when you place your cursor over the navbar area :

Make a hover effect navbar


Victory Teachers Blog - Asked in the comments : "If i hide this tool bar - how do i then access the edit buttons?"

Great question, What i use is a link in the footer to my dashboard.

Once your logged in to your account any link to the Blogger homepage will bring you to your homepage.

So just add this code to your sidebar or footer :

Blogger
Now you can click this to get to your dashboard.

You can also add a link to your 'Create a post' page and 'Layout Page'.

In your dashboard click 'New Post' then copy the URL address in the address bar at the top of your screen :
remove navbar blogger
Now put that URL into a link as shown below :

New Post


Replace PUT-URL-HERE with the URL you copied from your new post page.

You can do the same for your layout page, settings page or any page.Don worry about putting links to your pages on your profile only people logged into your account will be able to access them.

Drop Your Comments And Questions Below.

Libellés : ,

How To Make This Blog Your Home Page

Want to make sure you never miss a tip or trick for your blog?

Why not make Spice Up Your Blog Your Home Page, Now every time you go online you will see the latest posts first !

How to set your home page?

If you use Internet Explorer

Click Here


For all other browsers Firefox, Chrome, 0pera, Safari ...
All browsers are slightly different but, although the words they use vary, most work in broadly the same way. The following instructions should work in most current browsers.
  • Go to the page that you want to select as your homepage.
  • Open the main Internet tools menu in your browser it should be in the very top menu- this may be called Tools, Edit, Firefox, Opera or Safari (depending on your browser and operating system).
  • Select the tab marked 'General', 'Preferences', 'Options' or 'Internet Options' (depending on your browser).
  • You may see a button marked 'Use current page' or 'Use current'. If so, click this button then click OK. The page you were visiting should be saved as your homepage and you won't need to do anything else.
  • If not, look for a box entitled 'Homepage', 'Homepage location' or similar, which will contain the URL (web address) of your current homepage. Type http://www.spiceeyourblog.info, or the address of the page that you want, into this box and click OK. Your new homepage will be set.
If you need further help setting your homepage, check your browser's help menu or leave a comment below.

jeudi 24 septembre 2009

How to get a Feedburner Rss feed for your blog

One of the first things you should do when you start Blogging is set up a Rss feed..All blogs no matter what platform have a default feed, for Blogger the default feed is

www.Yourblog.Blogspot.com/feed/post/default

But the Google Owned Feedburner offers so much more and don't worry it is very easy to set up.

Feedburner offer so many extras and as you build your blog you will notice so many areas that Feedburner can optimize your blog, we will also go into how feed burner give you the option to provide a 'Subscribe by Email' as you see on most blogs and also you can add AdSense units to your feeds.

I covered Rss feeds and how to use them in detail in a previous post Click Here to check it out.

Lets get your Feedburner Feed


As Feed burner is owned by Google you can log in with your google account details.
(same as for Blogger ,GMail ,You tube etc..).

Step 1. Go to www.Feedburner.com log in or create an account if you don't already have a google account.

Step 2. You will now come to this page:

How to add a rss feed to your blog

Now just enter your blog URL in the space provided :

Example :

http://www.yourblog.blogspot.com

If you have a custom domain :

http://www.yourblog.com

Step 3. Your feed will be created and feed burner will take you through a few steps to get you started, don't panic and think you need to set up everything now as you can go back and make changes.

The one thing you need to set up is the address of your feed, this is similar as choosing the address of your blog and it is best to use your blog address or name.

Your feed URL will be :

http://feeds.feedburner.com/YouPickThis

Mine is :

http://feeds.feedburner.com/spiceupyourblog

Once you feed is ready take some time to look through the options in the menu to: Analyze, Optimize, Publicize and Monetize your new Rss feed.

You can now also change your blogger settings to use your new rss feed as default.

In your dashboard click 'Settings'--> 'Site feed' for your blog to find this option.

Email Subscriptions

You can allow visitors to your blog subscribe by Email.To activate this option you need to go to your Feedburner account and on the homepage click on your feed title.


This will bring you to the Manage feed area, in the top menu click 'Publicize"

feedburner

In the side menu click Email subscriptions.

class=

Here you can activate the Email subscriptions and get the code for a link or form to put on your blog.For more info on this Feedburner Email Settings.

For more info on getting a Feedburner Feed here is a link to 'Google Help' to set up a feed for :

o Blogger
o WordPress
o TypePad
o MySpace
o Podcasting

Drop Your Comments And Questions Below.

Libellés : , , , ,

mercredi 23 septembre 2009

What Is Rss / Subscribe / feeds?

What-Is-RssWhat is RSS? This is a regularly asked this question and it might be worth putting together a page to define RSS and hopefully help you on the topic.Do you want to keep up to date with the latest posts on your favorite blogs/websites?We have a number of ways that you can subscribe to this site and receive updates. The main one that our readers use is our RSS feed.


What is RSS?

RSS is a technology that is being used by millions of web users around the world to keep track of their favorite websites.


In the ‘old days’ of the web to keep track of updates on a website you had to ‘bookmark’ websites in your browser and manually return to them on a regular basis to see what had been added.


The problems with bookmarking


  • You as the web surfer had to do all the work
  • It can get complicated when you are trying to track many websites at once
  • You miss information when you forget to check your bookmarks
  • You end up seeing the same information over and over again on sites that don’t update very often


RSS Changes Everything


What if you could tell a website to let you know every time that they update? In a sense, this is what RSS does for you.


RSS flips things around a little and is a technology that provides you with a method of getting relevant and up to date information sent to you for you to read in your own time. It saves you time and helps you to get the information you want quickly after it was published.


RSS stands for ‘Really Simple Syndication’. Many people describe it as a ‘news feed’ that you subscribe to.


I find the ’subscription’ description helpful. It’s like subscribing to a magazine that is delivered to you periodically but instead of it coming in your physical mail box each month when the magazine is published it is delivered to your ‘RSS Reader’ every time your favorite website updates.


How RSS actually technically works is probably a lesson for another day but the key today is for you to understand why it’s good and how to use it.


Let me say right up front that I’m not the most technically savvy guy going around - but even I can use RSS. At first I found it a little strange to make the change from bookmarking to RSS but I found that when I started that I just couldn’t stop.


How to Use RSS


Get an RSS Reader - The first thing you’ll want to do if you’re getting into reading sites via RSS is to hook yourself up with an RSS Feed Reader.


There are many feed readers going around with a variety of approaches and features - however a good place to start is with a couple of free and easy to use web based ones like Google Reader and Bloglines. Either one will do if you’re starting out,as I say there are many to choose from but to get started either of these are fairly easy to use and will help you work out the basics of RSS.


Both of these feed readers work a little like email. As you subscribe to feeds you’ll see that unread entries from the sites you’re tracking will be marked as bold. As you click on them you’ll see the latest update and can read it right there in the feed reader. You are given the option to click through to the actual site or move onto the next unread item - marking the last one as ‘read’.


The best way to learn how to use either Google Reader or Bloglines is to simply subscribe to some feeds and give it a go. Both have helpful help sections to get you up and running.


Note: other options to tracking websites that you might already be familiar with include using pages like MyYahoo, MyGoogle and MyMSN.


Find Some Feeds to Subscribe to - there are two places to look for a site’s feed:


  1. On the Site
  2. In Your Browser


On Site Subscription

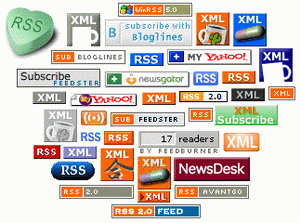
Over the last few years you may have noticed a lot of little buttons and widgets appearing on your favorite sites and blogs. Little orange buttons, ‘counters’ with how many ‘readers a blog has, links called RSS, XML, ATOM and many more.


They come in all shapes and sizes. Here are a few you might have seen:


Rss-Buttons


There are plenty more - but any time you see any of these buttons or anything like them it means that the site you are viewing almost certainly has a feed that you can subscribe to. In most cases it’s as simple as either copying and pasting the link associated with the button into your RSS Reader or clicking the button and following the instructions to subscribe using the feed reader of your choice.


Once you’ve done this and have subscribed to a few feeds you’ll begin to see unread items in your Feed Reader and you can start reading.


We Are Nearly Finished - First A Quick Remunder:
If you need more help or have an opinion or suggestion,
Please leave a comment Below,I reply to all comments.
It also really helps me to edit posts and with future posts if you let me know if a tip has worked on your blog.
This is a Do-Follow Blog so leaving a comment will also help Your blogs Google rank.
Ok Back to buissness....


Don’t want to Use an RSS Reader? Email is an Option


If the above explanation all just seems a little too complicated for you then please don’t worry. Many sites also enable you to subscribe to RSS feeds via a more familiar medium - Email.


I know that not everyone is into the RSS thing so at the top of our left hand sidebar there is a field where you can enter your email address and get a daily email with a summary of our latest posts. You can unsubscribe at any time and your email will be kept private and not used for any other purposes than to send these daily updates.


Click here to see the rss page for this website

Still Want to know more? Heres a quick video to help you.


If you have any extra questions drop a comment below.

Libellés : , ,

mardi 22 septembre 2009

How To Quickly Start Your Free Blog On Blogger

Shiny Blogger 3D LogoThere are now more Blog platforms than ever including WordPress, Tumblr, Live Journal and the one we will focus on in this post; Blogger.All of the above are free or at least have free versions and Blogger is no different, Blogger is a totally free way to quickly create an online presence.Your Blog is free as is the domain, hosting, image hosting and everything else.Here we will see how within a few minutes you can have your blog created and your first post live for the world to see.

Steps To Start Your New Free Blog


1 ) Go to www.Blogger.com and create an account.

If you already have a google account (used for : Gmail,Youtube,Picasa etc..) you can use those account details to log in.

2. ) Once your logged in click "create a blog"

3 ) Give you blog a name
This will be the name of your blog that appears in your blog header like 'Spice Up Your Blog' appears at the top of this page.You can change the name of your blog at any time so don't worry about getting it right first time.

4 )Choose an address for your blog, Your blog address is the URL that leads to your blog.

Your blog address will be a sub domain of blogspot.com so if you choose 'funnycatpictures'
your address will be - www.funnycatpictures.blogspot.com

Choose an address for your blog

5 ) Choose a template for you blog

Your blog template sets the style and appearance of your blog.You template can be changed at any time so don't worry too much about getting it right first time.As well as the templates provided by blogger you can get templates from other websites to use rather like you would get a new layout for a Myspace profile.

6 ) Success your new blog has been created

Your now ready to publish your first blog post !

Sucess your new blog has been created

Blogger Video :

Short demo on starting your blog


Drop Your Comments And Questions Below.

Libellés : , ,

lundi 21 septembre 2009

Easy Html Color Code Hex Chart

Use the tool below to get some of the most popular hex color values.

Libellés : ,

dimanche 20 septembre 2009

How To Add A Gadget To Your Blogger Blog

This is part of my 'Basics' Tutorials.This tutorial shows you how to add a gadget to your blog its another essential tool in building your blog and using the other tips and tricks i provide in this blog.Adding a gadget is quick and easy and there are lots of cool gadgets and widgets you can add to your blog.The short video below will bring you through the steps and you will be spicing up your blog in no time !


If you have any questions drop a comment below.

Libellés : , ,

How To Copy And Paste Code And Text

This is part of my 'Basics' Tutorials.Here we cover How To Copy And Paste this is absolutely vital not just for Blogging but for all activity's online you will need it in a lot all tutorials on this blog.By using the copy and paste technique you can copy large amounts of text or code quickly from one place to another.It only takes a few clicks and is really easy to learn.So lets look at a video showing you how to copy and paste !


If you have any extra questions just drop a comment below..

Libellés : ,

Privacy Policy

Privacy Policy for www.spiceupyourblog.com

If you require any more information or have any questions about our privacy policy, please feel free to contact us by email at Paul@spiceupyourblog.com.

At www.spiceupyourblog.com, the privacy of our visitors is of extreme importance to us. This privacy policy document outlines the types of personal information is received and collected by www.spiceupyourblog.com and how it is used.

Log Files
Like many other Web sites, www.spiceupyourblog.com makes use of log files. The information inside the log files includes internet protocol ( IP ) addresses, type of browser, Internet Service Provider ( ISP ), date/time stamp, referring/exit pages, and number of clicks to analyze trends, administer the site, track user’s movement around the site, and gather demographic information. IP addresses, and other such information are not linked to any information that is personally identifiable.

Cookies and Web Beacons
www.spiceupyourblog.com does use cookies to store information about visitors preferences, record user-specific information on which pages the user access or visit, customize Web page content based on visitors browser type or other information that the visitor sends via their browser.

DoubleClick DART Cookie
.:: Google, as a third party vendor, uses cookies to serve ads on www.spiceupyourblog.com.
.:: Google's use of the DART cookie enables it to serve ads to users based on their visit to www.spiceupyourblog.com and other sites on the Internet.
.:: Users may opt out of the use of the DART cookie by visiting the Google ad and content network privacy policy at the following URL - http://www.google.com/privacy_ads.html

Some of our advertising partners may use cookies and web beacons on our site. Our advertising partners include ....
Google Adsense
Clickbank
Chitika
Amazon


These third-party ad servers or ad networks use technology to the advertisements and links that appear on www.spiceupyourblog.com send directly to your browsers. They automatically receive your IP address when this occurs. Other technologies ( such as cookies, JavaScript, or Web Beacons ) may also be used by the third-party ad networks to measure the effectiveness of their advertisements and / or to personalize the advertising content that you see.

www.spiceupyourblog.com has no access to or control over these cookies that are used by third-party advertisers.

You should consult the respective privacy policies of these third-party ad servers for more detailed information on their practices as well as for instructions about how to opt-out of certain practices. www.spiceupyourblog.com's privacy policy does not apply to, and we cannot control the activities of, such other advertisers or web sites.

If you wish to disable cookies, you may do so through your individual browser options. More detailed information about cookie management with specific web browsers can be found at the browsers' respective websites.