vendredi 30 juillet 2010

Add Fixed Scroll Twitter, Rss And Facebook Icons To Your Blog

One of the things all bloggers strive to achieve is building a following.Be it getting readers to subscribe to your RSS Feed, Email Feed, Follow on Twitter or become a Facebook fan.Here on Spice Up your Blog we have published lots of posts with tips and tricks to make it as easy as possible for people to connect with your blog and get the updates.In this post i have a smart gadget that will display icons for your Rss, Email Rss Twitter and Facebook on the side of your blog.The icons have a 'Follow' message above them and are Fixed so when the visitors scroll the gadgets moves down the page also.

The icons are in a great position making it as easy as possible for readers to avail of any of the options.I have also chosen Social icons that are big enough to grab the attention of the reader yet small enough to not get in the way or block any content.So this is the perfect gadget for your blog and it's really easy to add, lets add these fixed icons to your blog.

Screenshot :

fixed float social buttons

Live Demo - Fixed Social Icon Gadget.

How To Add The Fixed Icon Gadget

Step 1. In your dashboard click 'Design' > 'Add A Gadget'

add a gadget blogger

Step 2. Choose A Html/Javascript Gadget

add html javascript

Step 3. Copy the code below and paste it into the Html/Javascript gadget :

Best Blogger Tips

You now need to add your Twitter and Facebook Usernames and you feedburner ID were shown in red.Once you have made the necessary changes to the code you can save the gadget.

Drop Your Comments, Views And Questions Below.

Libellés : , , ,

lundi 26 juillet 2010

Tool Tip Information Bubbles For Text And Image Links

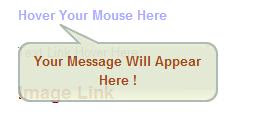
In this post we will see how to add a great looking message bubble to your links.The message bubble will contain any message you choose and can be added to both text links and image links.In a post published last March i showed you how to use the title tag to give information about links to readers but the tool tip goes much further.


information bubble for hyper links

Preview And Demo

Below you can see a screenshot of a link with the tool tip message


To see the live working example of the text and image links follow this link - Demo of tool tip

How To Add Tool Tip Bubbles To Your Links

Step 1. In your dashboard click 'Layout' > 'Edit Html'

Step 2. Find the following piece of code in your blogs Html : (Click Ctrl and F for a search bar to help find the code - More Info)


Step 3. Paste the following code Directly Above / Before

Best Blogger Tips

Step 4. You now have the code added to your template to display the tool tips the next step is to add code to your links.

When you create a text link use this code :


TITLE OF LINK HERETOOL TIP MESSAGE HERE


Example :

Spice Up Your BlogGo To Spice Up Your Blog

When You Create An Image Link Use This Code :

TOOL TIP MESSAGE HERE


Example :

Go To Spice Up Your Blog

Note - The code for the links is a little harder to use than regular hyperlinks so take you time and im sure you will get the hang of it !

Remember you can use the tool tip for any images on your blog not just in the posts, for example in the sidebars and footer.

Feedback

Will you use tool tip bubbles on your blog ?

Libellés : , ,

samedi 24 juillet 2010

Get Free Image Hosting With No Bandwidth Limits

Many of you will have noticed last month some of the images in the older posts on this blog were replaced with the ugly 'Bandwidth Exceeded' message from Photobucket.When i first started Spice Up Your Blog i hosted many images on Photobucket with no problems but as we became more popular and Spice Up Your Blog grew the Photobucket limits kicked in.Image hosting websites like Photobucket, Flickr and ImageShack manage to catch unsuspecting users with Bandwidth Limits rather than storage limits in an attempt to get them to pay for an upgrade.


Storage And Bandwidth

Here's the simplified explanation - For example Photobucket allow free users a huge amount of storage.You can upload lots of pictures and images to your account without any problems it's when you share those images the trouble starts.When others use images you store in your account it adds to your bandwidth quota.The Bandwidth limit unlike the storage limit is quite small for free users so when i share an image on Spice Up Your Blog and lots of people use it on their blogs my bandwidth usage increases.With a blog as popular as this one it takes very little time to reach the bandwidth limit and see all the images replaced with the ugly bandwidth exceeded image.


Photobucket Quote

"...Bandwidth is used when digital content is viewed from a link you posted on another website or sent in an email (e.g., MySpace, eBay, message boards, etc.). Bandwidth is a measure of the number of bytes passed over time via direct linking. It is calculated by adding up the size of each of your images or videos as they are sent from Photobucket. The “Monthly Bandwidth" number is the amount of bandwidth you have used within the last month. The month is determined by the day of the month you registered your account...."

Avoid Bandwidth Limits

First off if you are a Blogger user try to upload your images directly to your blog.If you have an image you want to use in anywhere in your blog create a post and upload the image, remember you don't have to publish the post just grab the image URL.Did you know all the images you have uploaded to your blog are automatically stored in Picasa web albums ? You can check out your Picasa Web account here - Picasa Web Albums

No Bandwidth Limit Image Hosting - One of the image hosting websites i have found with no limit on Bandwidth is IMGboot.Although they have restrictions on other parts of accounts the storage and Bandwidth are unlimited.You can check them out here - IMGboot.com

InfoRemember you can get all these tips sent directly to your email and stay a step ahead.Its a quick and easy service Provided for Free by Google.Just fill in the Email form below the post or Click here for other Rss Options. If you need extra help on this or any tutorial just leave a comment, I love comments and feedback so this Blog is Do-Follow - when you comment here it helps Your Blogs Google rank !


Feedback


IMGboot is just one site with no limits on Bandwidth have you found other image hosting sites we should know about ?

Libellés : , , ,

jeudi 22 juillet 2010

How To Add Social Bookmark Buttons To The Top Of All Blogger Posts

You have probably noticed most blogs now have social bookmarking options above as well as below their posts.Here on Spice Up Your Blog we have almost 20 different sets of social bookmarking gadgets for below your posts so i think its about time i covered how to add a social bookmarking gadget above the posts.By above the posts the position i am referring to is directly below the post title and before the first line of text.Of course you could add any bookmarking gadget above the posts but in general it will look out of place, you want the bookmarking gadget above the posts to be compact and just include the main options.The gadget we have for you in this post is perfect, it wont take up too much room at the top of your posts, it look great and includes buttons for Twitter, Facebook, Digg, Stumble Upon as well as a Email This Post option.

social bookmarking gadget

Preview And Demo

Below you can see an image preview of the Top Bookmarking Gadget.


To see how the gadget works you can view a live Demo / Sample here - Demo Of Top Bookmarking Gadget

How To Add The Top Bookmarking Gadget To Your Blog

Step 1. In your dashboard click 'Design' > 'Edit Html' > Tick the 'Expand Widget Templates' box.


Step 2. Find the following piece of code in your blogs Html :
(Click Ctrl and F for a search bar to help find the code - More Info)

]]>


Step 3. Paste The Following Code Directly Above ]]>

.social { border: dashed #ddd; border-width:1px 0 1px 0; margin: 10px auto 10px; display:block; padding: 3px 0 1px 0px; overflow: hidden; }
.social .social_button {float: left; display: inline; overflow: hidden; height:22px; }.social .si { float:left;padding-top:3px;}
.social .social_button.dg { margin: 0px 0 0 30px ; padding-top: 2px;}
.social .social_button.tm { margin: 0px 0 0 32px; padding-top: 4px;}
.social .social_button.fb { margin: 0 0 0 15px; padding-top:3px;}
.social .social_button.su { margin: 0px 0 0 35px; padding-top: 2px;}
.social .social_button.em { margin: 0 0 0 35px; padding-top: 3px;}
.social .social_button.em a{background:#eee url(http://img180.imageshack.us/img180/1989/emailj.gif) 3px 50% no-repeat; padding:2px 3px 2px 22px; font-size:10px; border:#ddd 1px solid; text-decoration:none; -moz-border-radius: 3px; -webkit-border-radius: 3px;}
.social .social_button.em a:hover {background:#ddd url(http://img180.imageshack.us/img180/1989/emailj.gif) 3px 50% no-repeat}
.social .social_button a img { border: 0; padding: 0; }
.social strong { font-size: 11px; float: left; margin:2px 0 0 0; color:#555;}
.clear{clear:both;}


Step 4. Find the following piece of code in your blogs Html :
(Click Ctrl and F for a search bar to help find the code - More Info)


Step 5. Paste The Following Code Directly Below


Best Blogger Tips

mercredi 14 juillet 2010

Avoid Getting Banned From AdSense - Report Invalid Clicks

One of the main reasons for people having their AdSense account closed and loosing all earnings is invalid clicks.Clicking ads on your own blog on purpose is just plain dumb, you will be caught and could lose the chance to ever use AdSense again.Their are other scams like getting friends to click your ads or agreeing with other bloggers and webmasters to form a 'Click Group' in which they click each others ads.While you may think you can get away with these scams it wont be long before you receive the dreaded Email from the AdSense team.In this post we will see what activity looks suspicious on your account and how you can report accidental clicks or rough clicks on your account.


report adsense clicks


You would be surprised at how often people accidentally click there own ads.In the same vein sometimes a friend may think they are doing you a favor by clicking your ads.I recently read a blog post in which the author told how he received an Email from a blogger telling him he had clicked all his ads and asking him to return the favor.Instead of returning the favor he reported the incident to Google, an action that probably saw the 'Happy Clicker' banned.While this may seem harsh the simple fact is you need to cover yourself and keep your account clean.

AdSense track all clicks and any strange activity will stand out.If your account shows a surge in clicks it will be checked out.If your account receives lots of clicks from the same IP address it will be checked out.If your account receives clicks from your IP address....If your account receives clicks from IP address in your region....I have also read that all accounts are checked once they reach the payment threshold.AdSense is Google's main source of income so they will be ruthless when it comes to keeping it clean.

Report Invalid Clicks

The best way to stay onside with AdSense is to report any invalid clicks before they find them.If you have accidentally clicked on your own ads, think a friend was clicking on your ads,  or if you have been contacted by someone looking to set up a 'Click Group' you need to take the matter into your own hands.

Were To Go

-To report any of these instances follow this link and you will find the appropriate report form, Scroll to and click the 'Policy violations' link - AdSense Contact Support

-Another Must See Post Is - You Must Have A Privacy Policy How To Get One

-If you have any questions you would like answered regarding AdSense you can post them here - AdSense Help Forum

-We also cover AdSense Tips in the following posts - Help Using AdSense


Drop Your Comments And Questions Below.

Libellés : , ,

dimanche 11 juillet 2010

How To Copy And Use The Favicon From Any Site

One of the subjects i have not covered on Spice Up Your Blog is Favicons.A Favicon (Favorite Icon) is the small image that appears at the top of the browser and in the address bar when on any website or blog (See Example Image Below).The main reason i haven't posted about Favicons is because there are hundreds of posts already showing how to add Favicons to your blog.However although there are posts showing how to create a favicon for your blog wouldn't it be much easier to just get a cool Favicon someone already created ?.Those of you who have experience with favicons have probably landed on a site and thought 'That Favicon Would Look Cool On My Blog'.


Example - Below you can see the current favicon on Spice Up Your Blog


Note - I have since changed to this favicon :


Having recently created a Guitar Chords Blog i hadn't yet got the chance to create a Favicon for it, then i landed on a guitar site with a cool Favicon that would really suit my new blog....So i took it.Although there are no set rules against you using a Favicon from another site i still think you need to keep a few things in mind.Firstly you don't want to use a Favicon from a very popular site as most people will be familiar with it and it will look very unprofessional.Secondly you don't want to use a favicon from a rival blog, if your blog is about cookery don't copy the Favicon from another similar cookery blog.The Favicon i used was from a Static Website (A website that does not add fresh content).Once you stick to these suggestions you should be fine.

So in this post i will show you how to get the Favicon from any Blog or Website And use it on your site.If you don't yet know how to add a Favicon to your blog don't worry i will also show you how that's done.

How To Get The Favicon Image From Any WebSite Or Blog

So once you have seen a cool favicon here is how to get the image code, remember for a favicon to work the image must be .ico format (If you don't understand what that means don't worry).

1. Copy The URL from the site that has the Favicon, Example : www.spiceupyourblog.com

2. Follow this link to GetFavicon.org

3. Enter the URL of the site in the bar at the top of the GetFavicon website and click Get Favicon.

4. You will now be shown the favicon and the image URL (See Image Below)

5. Right Click on the favicon image URL and copy the link location, you can now add the image URL to your template as i will explain below.(As you can see in the image you are told to save the link but just copy link location)


Adding The Favicon To Your Blog

We now want to add the favicon to your blog, there are a number of ways to do this but i think i have the easiest way.Remember this method will also work for a favicon you create yourself.

1. In your dashboard click 'Layout/Design' > 'Edit Html'

2. Find The following piece of code in your blogs Html
(It's easy to find at the very top just a few lines down)


3. Paste the following code directly below


4. Add the Favicon Image URL to the code in the position shown in red above.

Example -

InfoRemember you can get all these tips sent directly to your email and stay a step ahead.Its a quick and easy service Provided for Free by Google.Just fill in the Email form below the post or Click here for other Rss Options. If you need extra help on this or any tutorial just leave a comment, I love comments and feedback so this Blog is Do-Follow - when you comment here it helps Your Blogs Google rank !


Once you have the code added to your template with your Favicon image URL in place save your template and check out your blogs new look !

What do you think have you seen a cool favicon you want to use on your blog ?


Let us know if you add a favicon to your blog...

Libellés : , , , ,

samedi 10 juillet 2010

How To Fully Customize And Edit The LinkWithin Related Posts Gadget

The Link Within Related Posts With Thumbnails Gadget is hugely popular among bloggers using every blog platform.With no code needed to add the gadget to your blog and the script automatically generating the posts to be listed Link Within is easy to use and effective.However there are some changes you may like to make to the gadget in terms of appearance, Text and Position of the gadget.In this post we will see how to do the following.
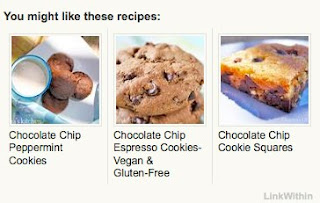


Note - We recently published a similar related posts with thumbnails script with no number of posts limit and other extras : New Blogger Related Posts With Thumbnails

Options And Settings

1. How To Get The Link Within Gadget - How To Easily Add The Gadget To Your Blog.

2. How To Change The Text That Appears Above The Gadget - Change The Default Heading Text (By Default The Heading Is 'You May Also Like').

3. How To Place The Gadget In Different Positions Below Your Posts - By Default The Gadget Appears Below The Last Line Of Text In Your Posts But You Can Move It.

4. How To Have The Gadget Appear On Post Pages Only - If You Use The Read More Post Summary's You Can Hide The Gadget On The Home Page.

5. How To Remove The LinkWithin  Link Below Related Posts - You can remove the link to LinkWithin, I don't recommend this as I think they deserve the credit but I will leave it up toyou.


1. How To Get The Link Within Related Posts With Thumbnails


Adding the gadget to your blog is quick and easy.First follow this link to the Link Within Website.On the homepage fill in your Email, Blog URL, Platform (This Tutorial Is For Blogger) and number of related posts you want displayed.For most Blogger templates you should display 4 posts.Click Get Widget (You May Be Required To Add Your Blogs Rss Feed).You will now be directed to the second installation page.

*Click Install Widget for blogger to pop up in a new window.
*Log in if required.
*If you have more than one blog choose the blog you want the gadget added to.
*The widget title will be Link Within as shown below but i advise leaving the title blank.
*Click add widget as shown below.


Move Gadget - On your layout/design page move the gadget below the posting area as shown below.


The gadget has now been added to your blog.

2. Change The Title Of Link Within Gadget


By default The Text above the related posts is "You May Also Like" but you can change this.

A. In you dashboard click Design/Layout > Edit Html.

B. Find The Following Piece of code in your blogs html.It wont be hard to find it's at the very top :


C. Copy The Code Below And Paste It Directly Below


D. Replace YOUR TITLE TEXT HERE with the title you want displayed and save your template.

3. Move The Position Of The Gadget Below Your Posts


If you have a number of gadgets below your posts like social bookmark buttons, AdSense or Rss options you may like to move the Link Within Related Posts Widget.Here is how you can place the gadget into position.

A. In your template place the following code were you want the gadget to be displayed :


Save your template.

4. Display The Gadget In Only The Post Pages On Your Blog


If you use the read more post summary's on your blog you will want the gadget displayed on the post pages only.Check out this post in which i go into detail on Showing gadgets in post pages only.

5. Remove The Link Within Link Below Related Posts


Add the following Css to your blog :

#linkwithin_logolink_0 {display:none;}

That should help you get the most from the great Link Within related posts gadget.If you have any questions or suggestions drop them in the comments below.

Libellés : , , , ,

mardi 6 juillet 2010

How To Use Image Descriptions For Better Google Search Rank

Every image you place on your blog could help drive traffic and visitors to that blog.In fact adding descriptions to the images you upload is one of the first things most SEO'S will tell you to help with Search Engine Optimization.In this post you will see why adding descriptions help your blog rank higher in search results and how it can also bring direct traffic.Of course we will also see how the descriptions are added, a process that has become a little harder with the new Blogger post editor.And we have a video from Google Employee Matt Cutts on the Importance of Descriptions.

image descriptions and alt tags

Alternative Text

So far i have been referring to 'Image Discriptions' but the actual term used is 'Alternative Text' or 'Alt Tags'.Alt tags have a number of purposes, they help search engines like Google know what the image is about and what the image contains.This is why having alt tags for all your images help your blogs search rank.By explaining the content of an image you are helping Google index the post the image is in.Lets say for example you upload a picture of U2 singer Bono to a post.If you have the alt tag of 'Bono from U2' Google will know the post is related to Bono.If you went further and added the alt tag 'Bono from U2 at the Superbowl half time show' now Google know your post is related to u2, Bono, The Superbowl and the half time show.The more information you can give search engines to index your blog posts the better.

Image Search 

So how can using alt tags on your images help get direct traffic to your blog ? Once again it's through search results but this time it's from Image searches.Both Google and Yahoo image searches are very popular and by letting these search engines know what your image is about you will soon get your blog displayed in image search results.So if someone does an image search for Bono, U2, Superbowl or  Halftime show your blog and the image will be returned in the results.

The reason we call these descriptions Alternative Text is because of their other purpose.If someone views you blog with a screen reader or for any reason they can not view the image then the Alternative Text will be displayed in place of the image.

How To Add Alt Tags To Images

Adding an alt tag to an image is actually very easy.On the old blogger post editor the alt tag was already in the image code and you just needed to add the text.The new editor however does not add the tag (They say it's in the pipeline) but you can add the tag and text in a few seconds.

This is an image i just uploaded to Blogger of, you guessed it Bono at the half time show.


This is the Html code for that image, it has no alt tag


Here you can see were to add the alt tag


This is the image Html with the alt tag and discription


As you can see i have added an in dept description but all the information is relative to the image.So when you next upload an image just add alt="" and give the picture a description.Below i have a video from Google employee Matt Cutts with more information on the importance of alt tags.

InfoRemember you can get all these tips sent directly to your email and stay a step ahead.Its a quick and easy service Provided for Free by Google.Just fill in the Email form below the post or Click here for other Rss Options. If you need extra help on this or any tutorial just leave a comment, I love comments and feedback so this Blog is Do-Follow - when you comment here it helps Your Blogs Google rank !

Video - Matt Cutts On Image Alt Tags

"..Matt Cutts works for the Search Quality group in Google, specializing in search engine optimization issues..."


Do you use alt tags on your images ? Will you start using alt tags now ? Let Us Know...

Libellés : , ,